Olympus E-500 ''Panchromat'': Monochrome conversion
It always bothered me a little bit that the image sensors in modern digicams are effectively limited in resolution by a Bayer pattern and an antialiasing filter. Of course you need both of them to make coloured images which don't have any nasty moiree effects under any circumstances. But what if you simply need the absolute maximum of resolution for a perfect monochrome image? You'd neither need the one nor the other. But you won't find an affordable camera without them. You can start with some thousands for an astrophotography cam or even spend eight grand for a Leica M Monochrom. Sounds neat, huh? ;).
I've read about another possibility in a forum. A brave hacker simply removed the cover glass from the sensor and ground down the microlenses and Bayer pattern with a Dremel. There's also a video on YouTube where another one uses a pencil instead to simply scrape the layers off. It worked, although the risk for some (or a lot) dead pixels is rather high. There's a company out there who does just that: LDP offers you modified Bodies, but they’re not exactly cheap, either.
Seems to be easier to simply swap the sensor with a panchromatic one, which doesn’t feature a Bayer pattern right from the start. The biggest problem about that is, however, that there're almost no monochrome sensors out there! They're mainly designed for scientific purposes like microscopes or measuring devices, which are not produced in such high quantities like consumer products. That's why you're likely to not find a monochrome version of your current DSLR's sensor, and if so, it won't be easily obtained at DigiKey, nor would it be cheap.
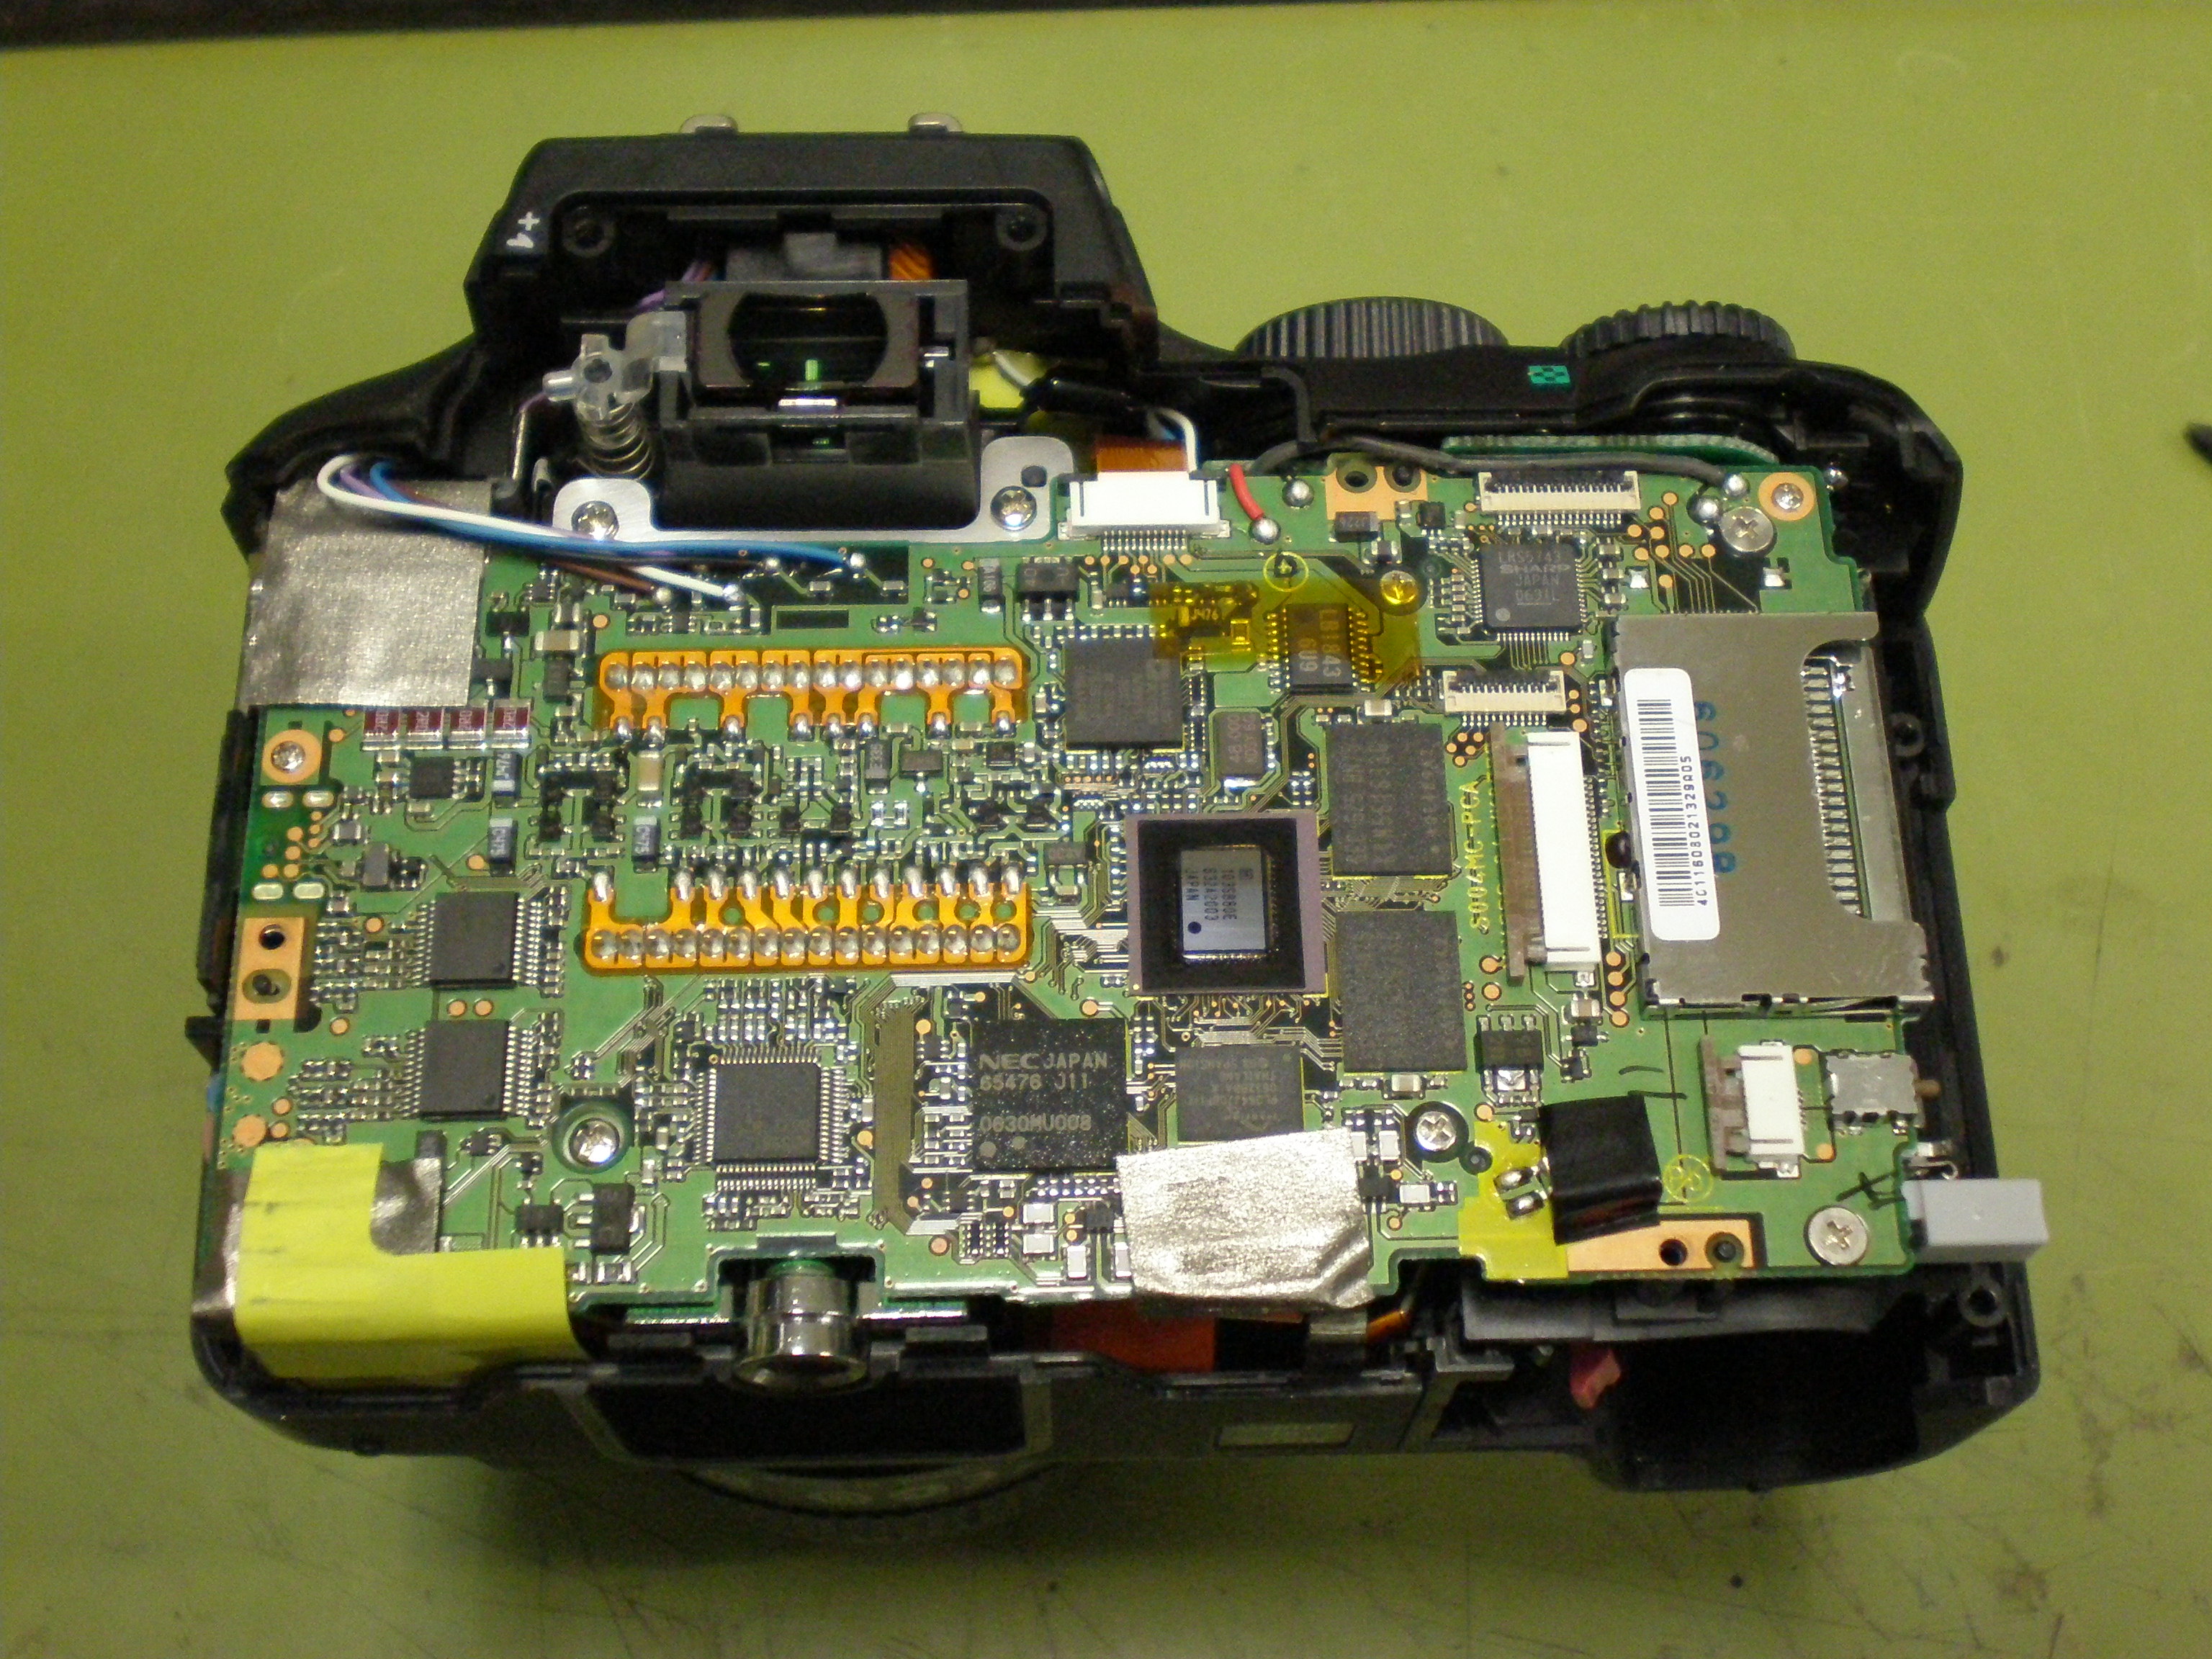
Olympus E-500 inside
My good ol‘ Olympus E-500 features a Kodak KAF-8300CE, an 8MP CCD in a ceramic DIP package with real pins on it! Very uncommon these days, where everything's surface mounted to flex PCBs. Anyway, the monochrome version of this sensor is very common in astro-photography, so they're still around and rather easy to source.
Pricing is another thing, though. I received several quotes for a single piece (most of the suppliers stock more than 100 of them), all ranging from $300 to $500. Not exactly cheap, although it doesn't sound overpriced.
Luckily I found a German supplier who offered me one sensor for less than EUR 100, which sounds OK to me and effectively saves me from the hassle of chinese shipping costs and customs etc. at the same time.
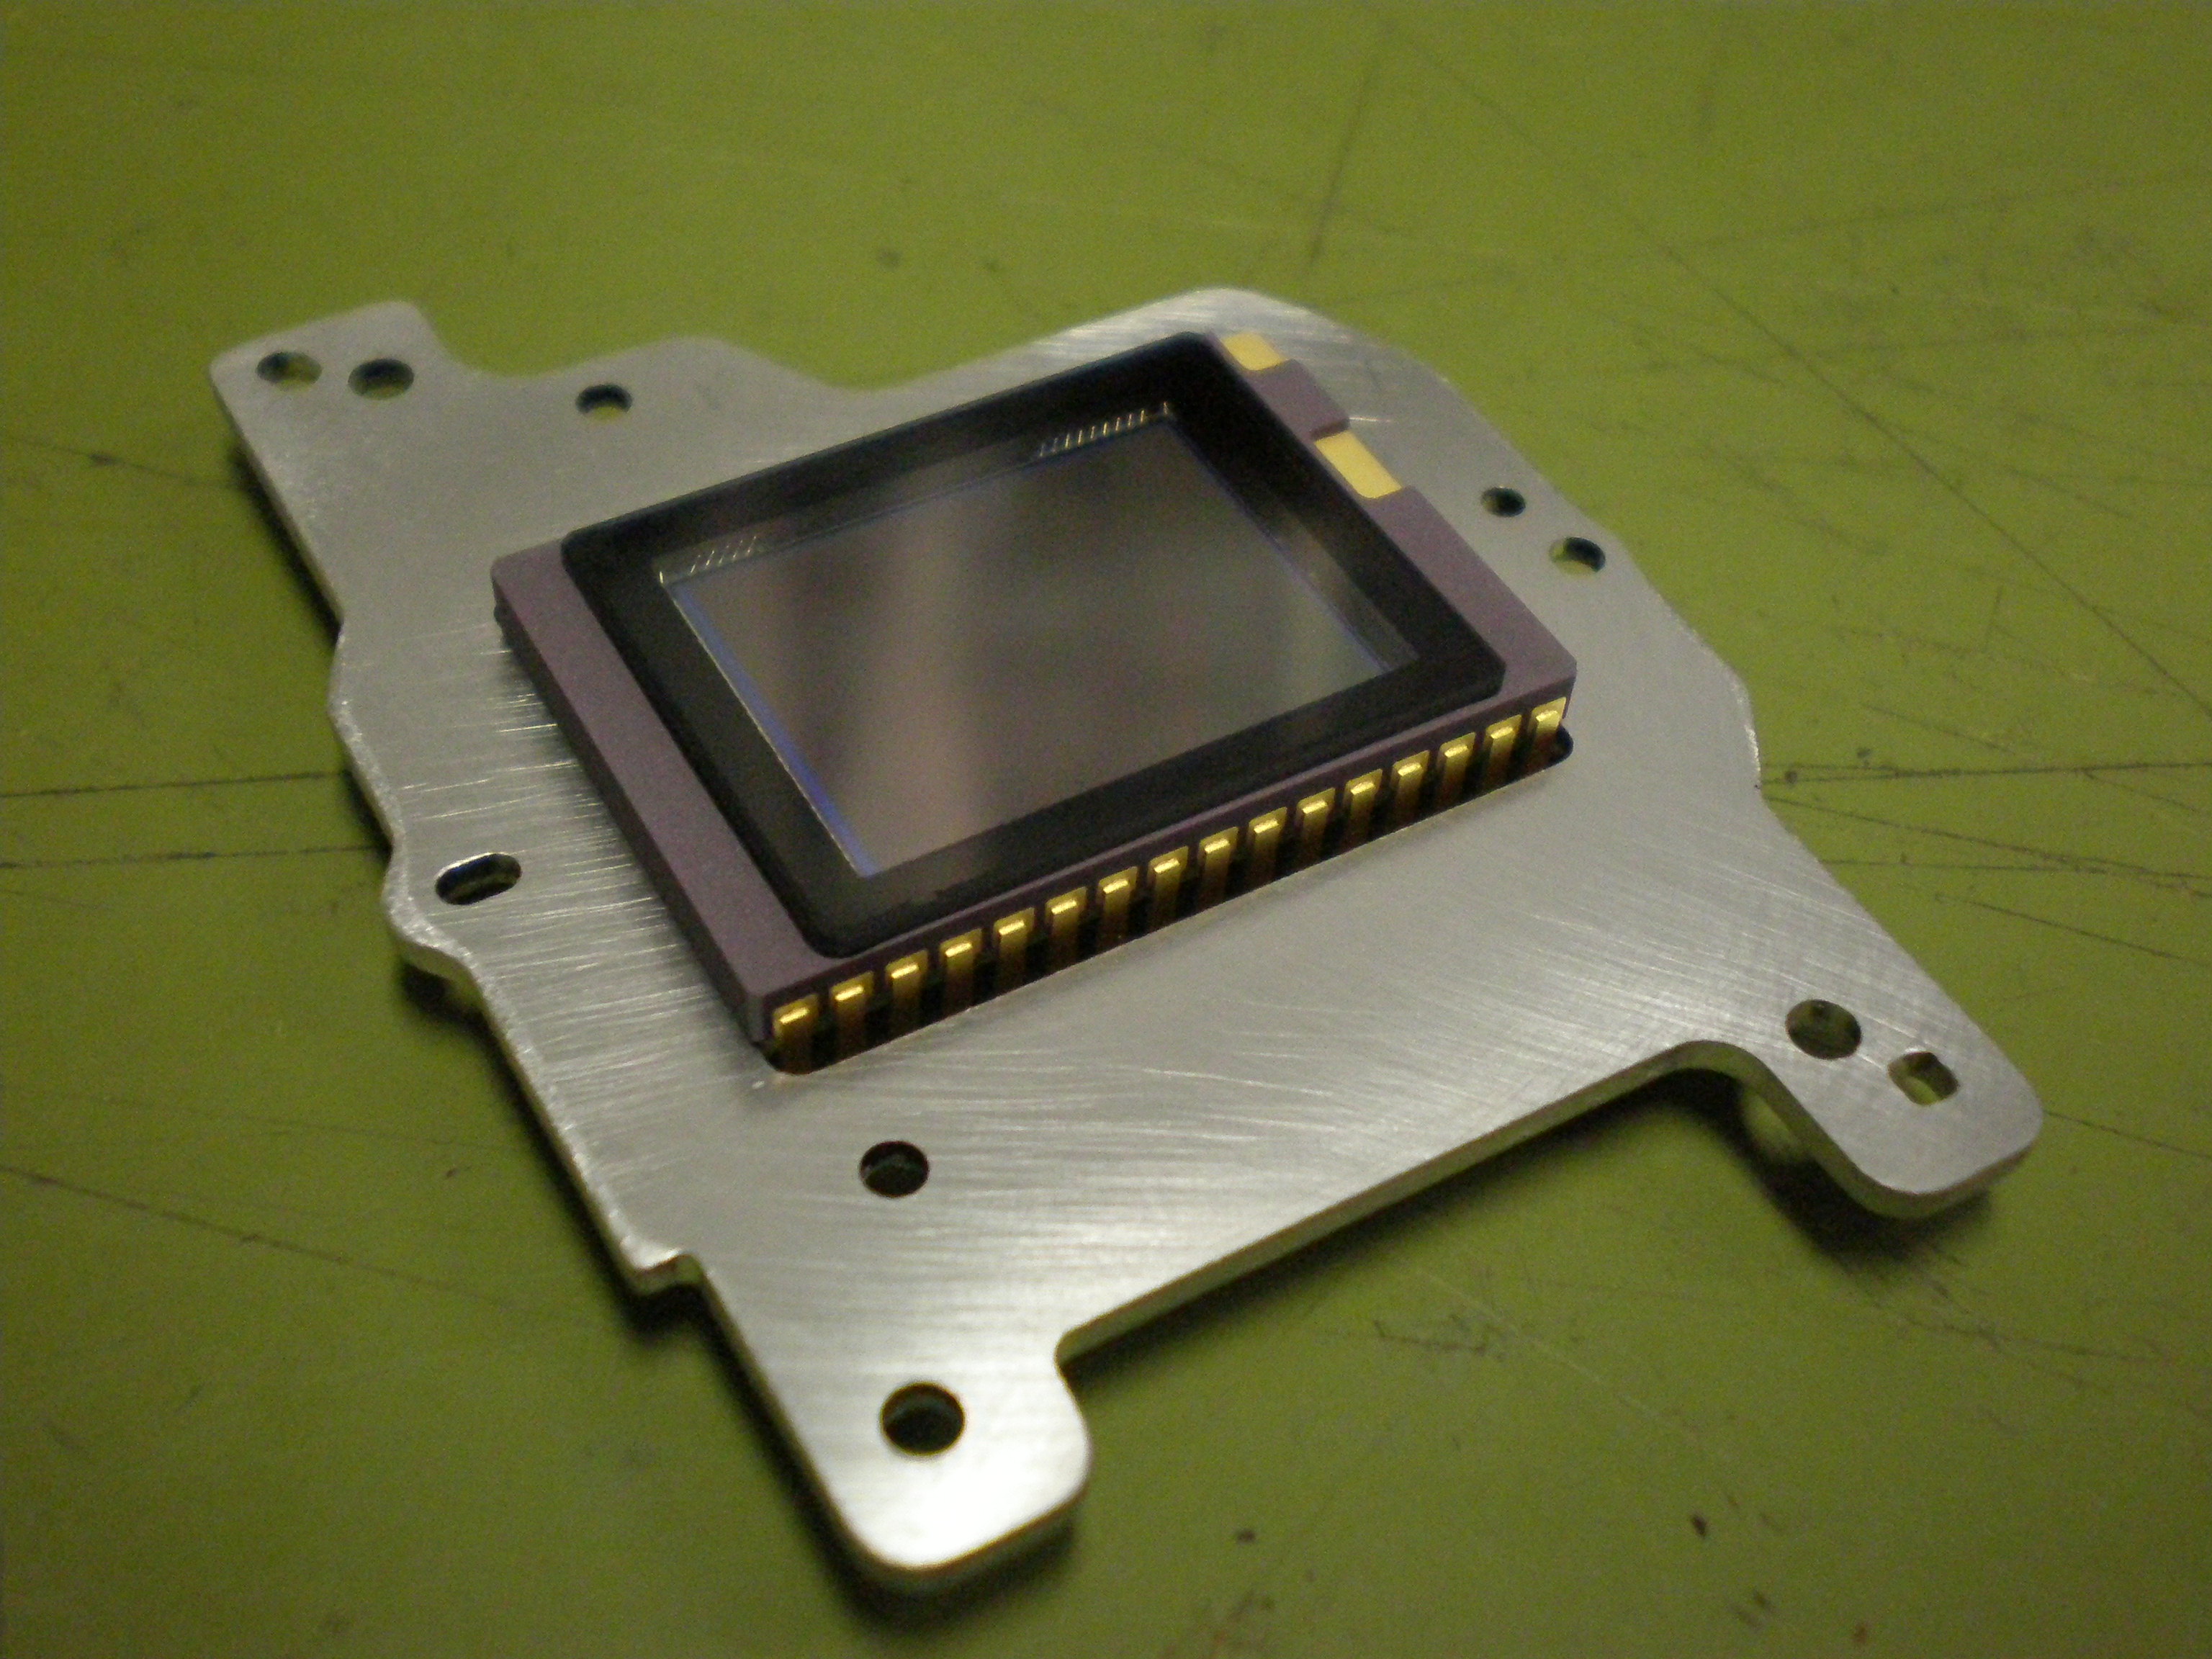
The sensor unit with mounting plate
Just as life goes, I was able to get a Canon Body really cheap, so without further ado I spent all my money to get me a nice Sigma 18-35mm F1.8 DC HSM, effectively performing a system change :) . That leaves me with my E-500 free to fiddle with, like I already started to do.
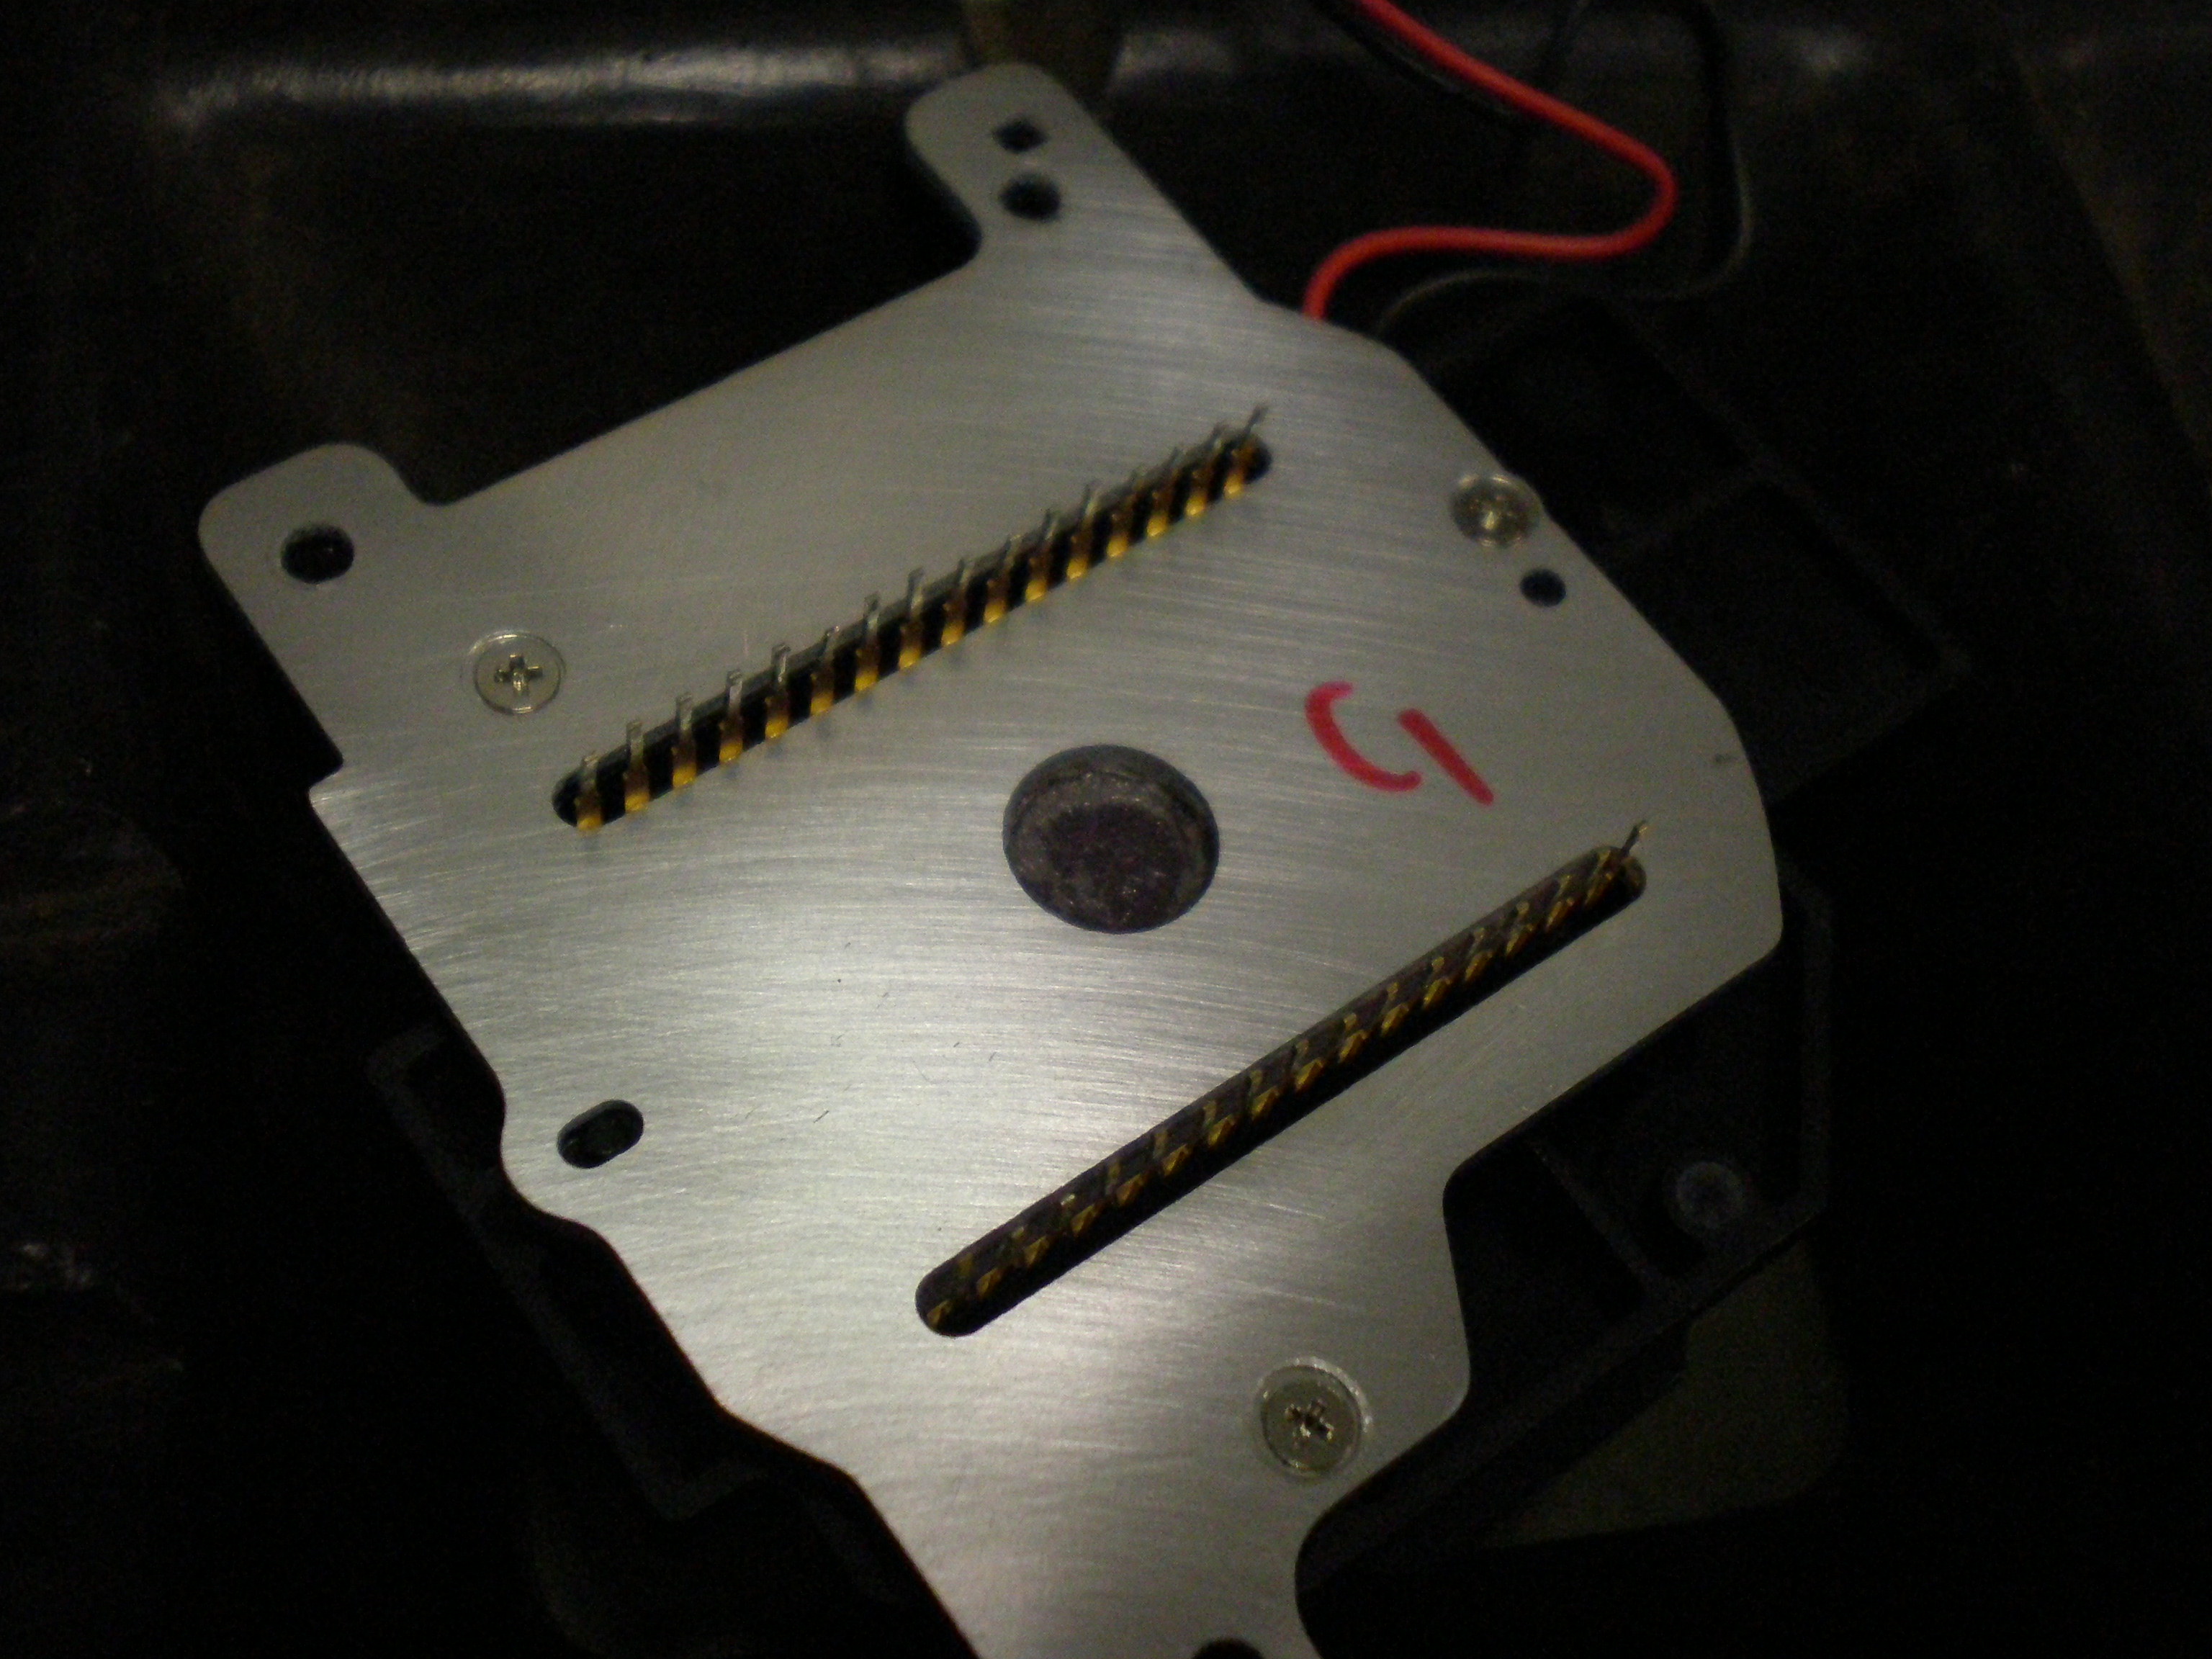
The sensor unit from below. That hole really came in handy for separating them two...
So the E-500 went on the bench. It was rather straight forward to disassemble everything down to the sensor unit. Separating the sensor from the mounting plate was a little tricky, though, since they’re firmly glued together. I managed to separate them with a lot of force, leaving the old sensor intact, but deforming the mounting plate. Had to put it between some scrap PCBs and carefully use a hammer to straighten it back out.
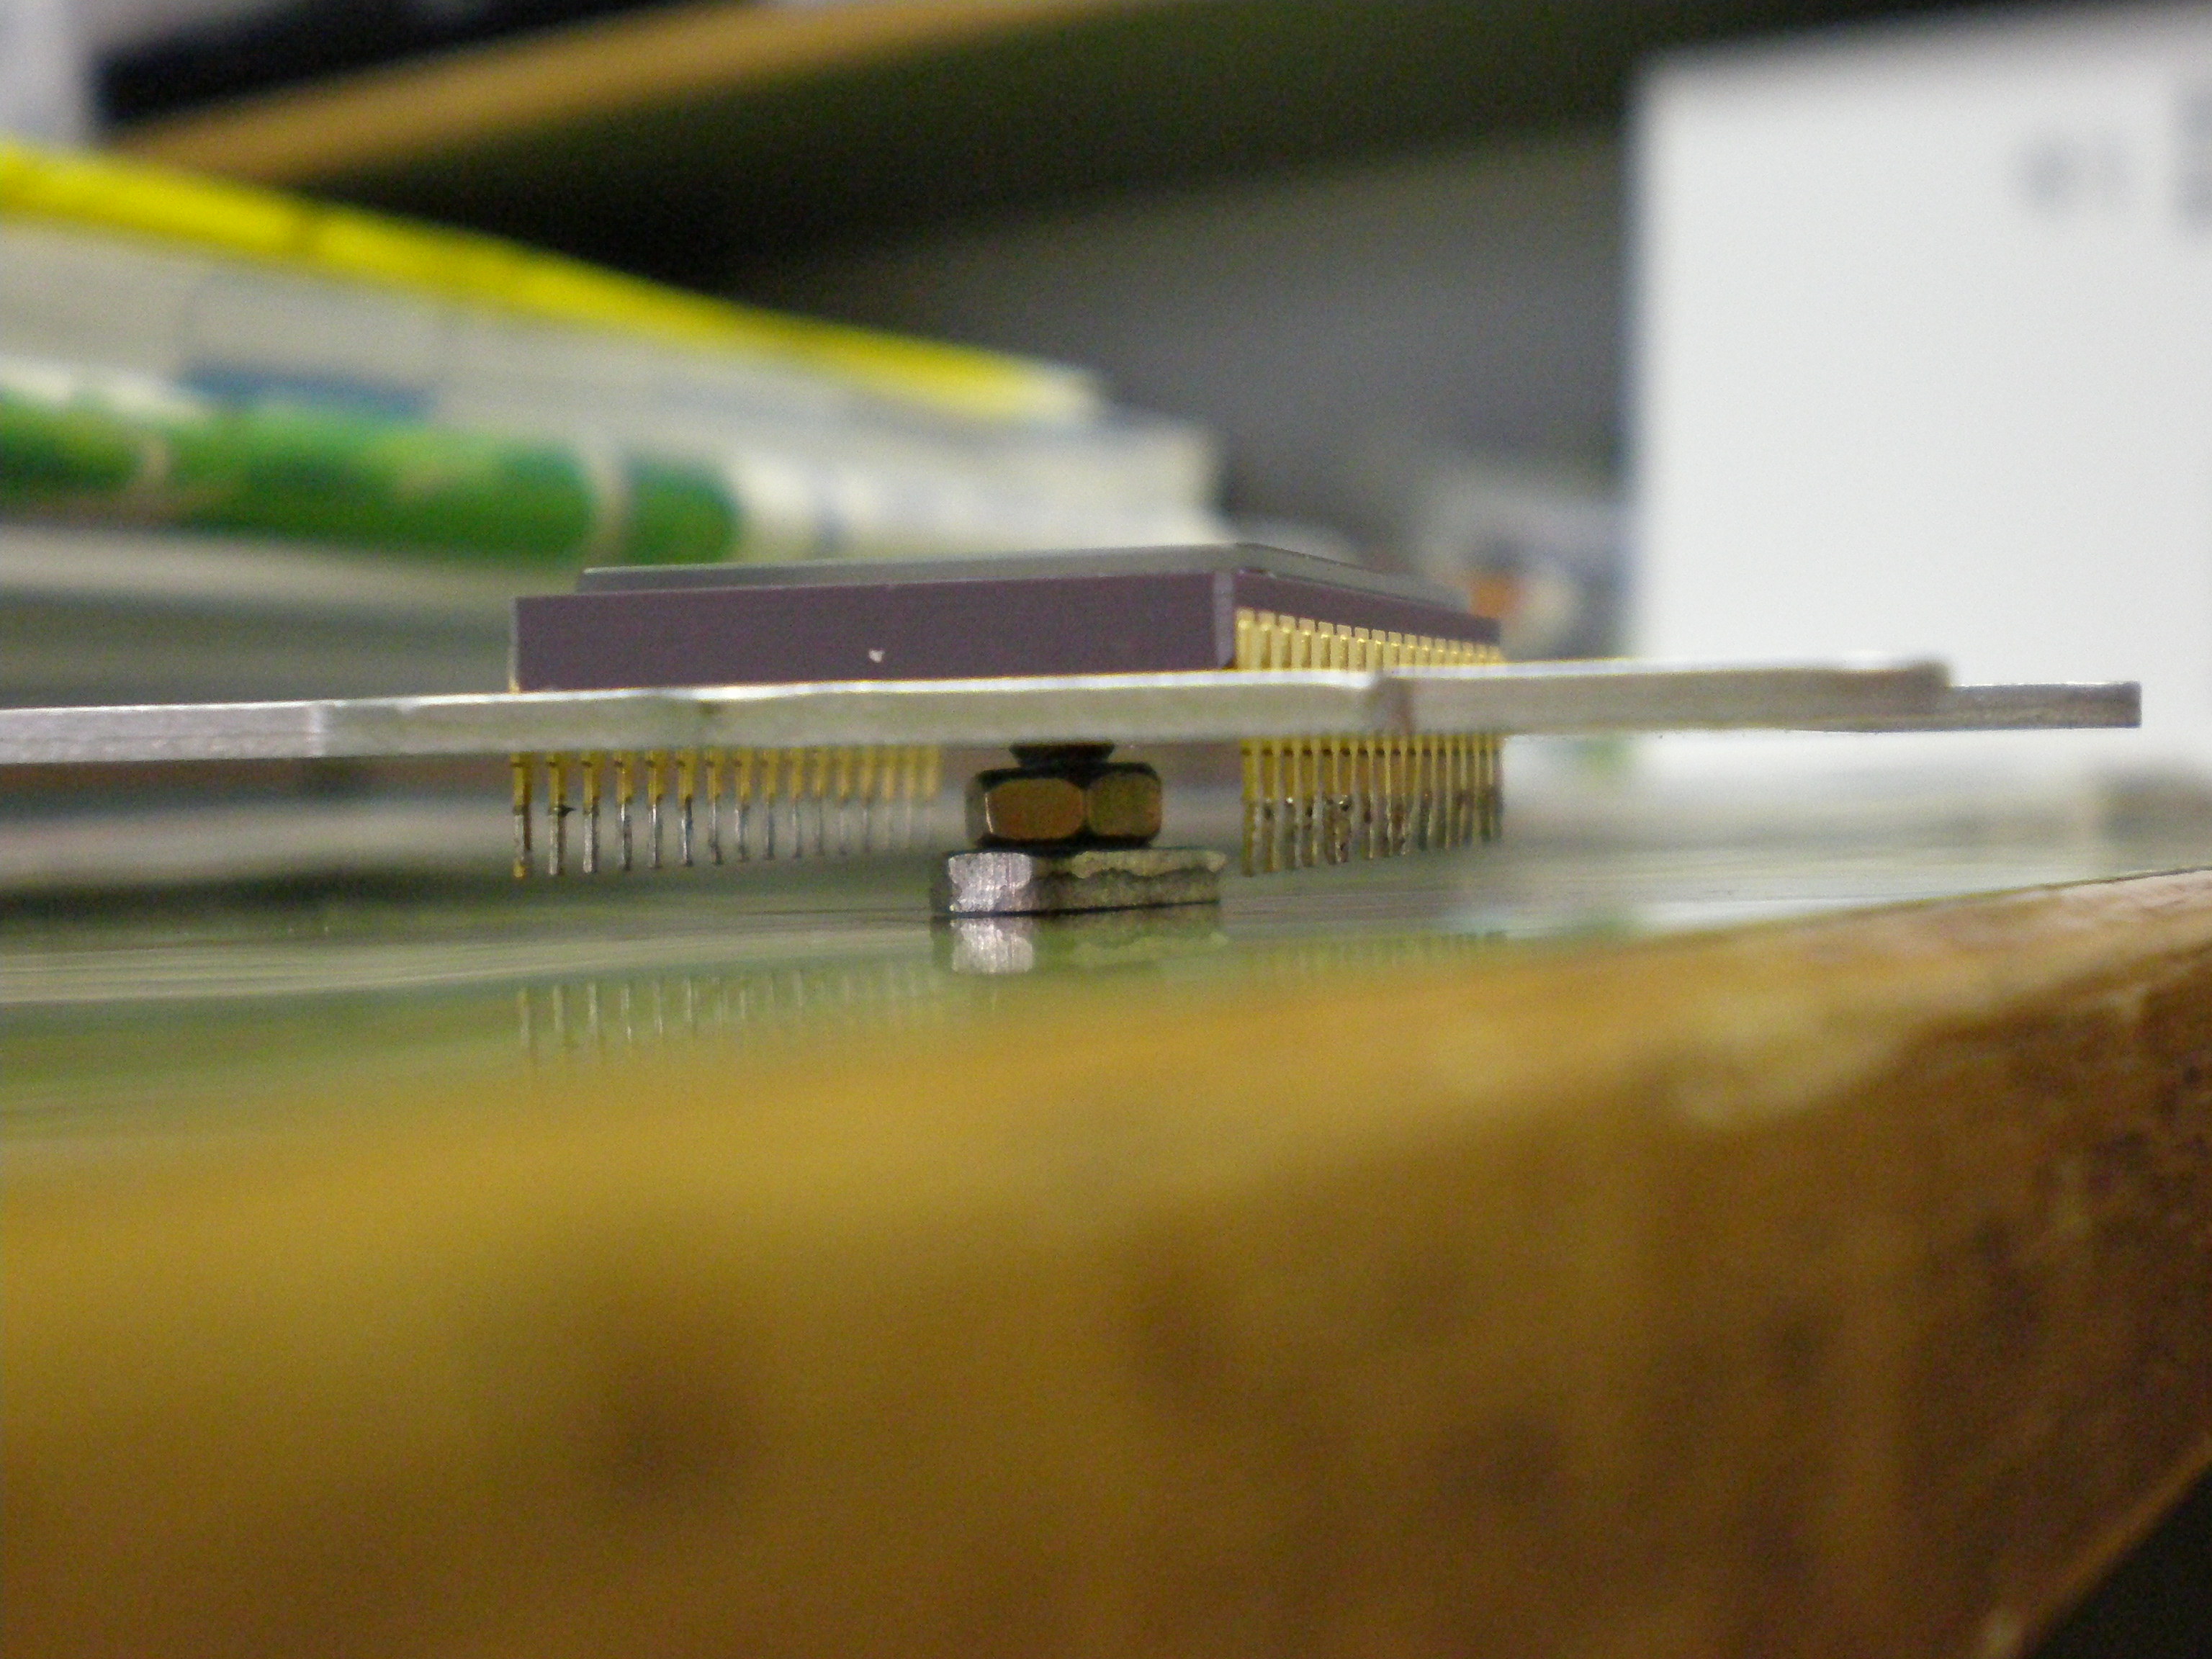
The screw in the bench pressed against the sensor while I was applying force from above on the mounting plate with a pair of pliers.
The new sensor was then glued onto the mounting plate with two drops of Epoxy, aligning it by eye. Maybe I should have made myself some kind of guide for that, since it's a bit tilted against the viewfinder now. But hey, could have been worse :) .
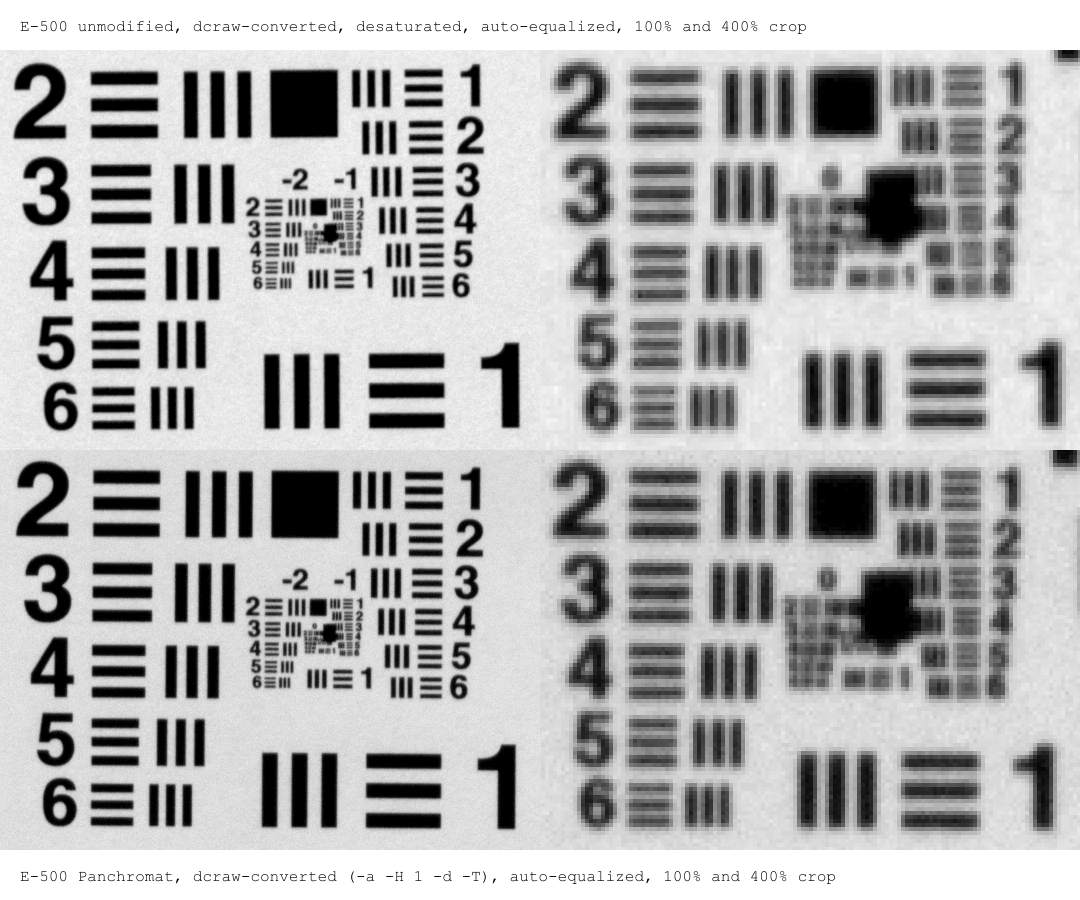
I then put everything back together, leaving the filters in place for now, and here's the first result:
before and after with new sensor and old filter
Both pictures were taken with the same lighting and exposure. The new sensor is more sensitive than the other, that's why the bottom half is a bit pale. I found the difference to be about 1 EV, much more than I expected! I could only get a KAF-8300XE (monochrome without Microlenses), which should have been a bit less sensitive, according to the datasheet:
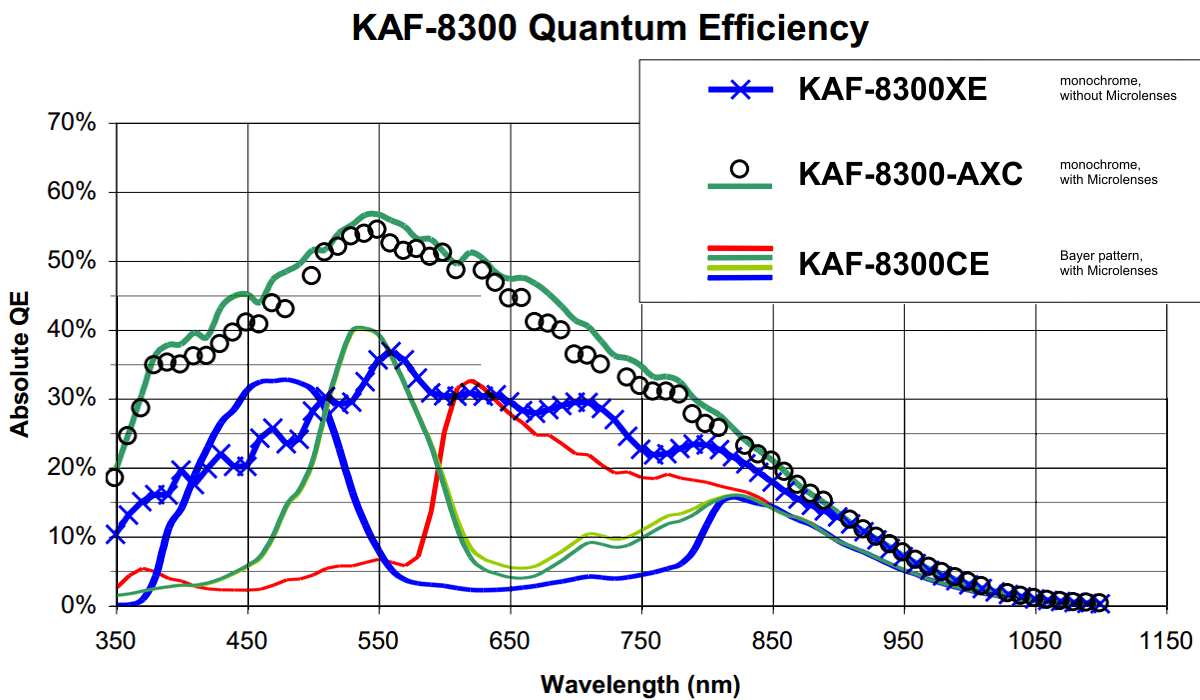
Quantum Efficiency
So far so good, camera's working again and it still produces sharp images, but there's no real gain in resolution. In theory it should look a little better now for certain situations, since there's no need for debayering anymore. The camera still does it, making the JPEGs as useful as before, but that's what raw converters are there for. If you're curious: The pictures on the camera display have a strong magenta tint. Setting the color mode to monochrome is advisable.
For a real gain in resolution I'd have to get rid of the antialiasing filter. Unfortunately it is not separate, but glued together with the IR filter to a 3mm thick unit. Simply removing this without a replacement leaves me with a strong focus shift, now being unable to achieve infinity focus :( . I was hoping to be able to compensate for this by leaving out the shims below the sensor unit, but they have not been thick enough.
Now I'm looking for a replacement glass to get back my autofocus. I'm not sure wether I should go for a float glass window, leaving me with a nice IR ability (though making an on-lens filter necessary for normal shots), or a hot mirror.
However, I was able to make some manual focused test shots at short distances:
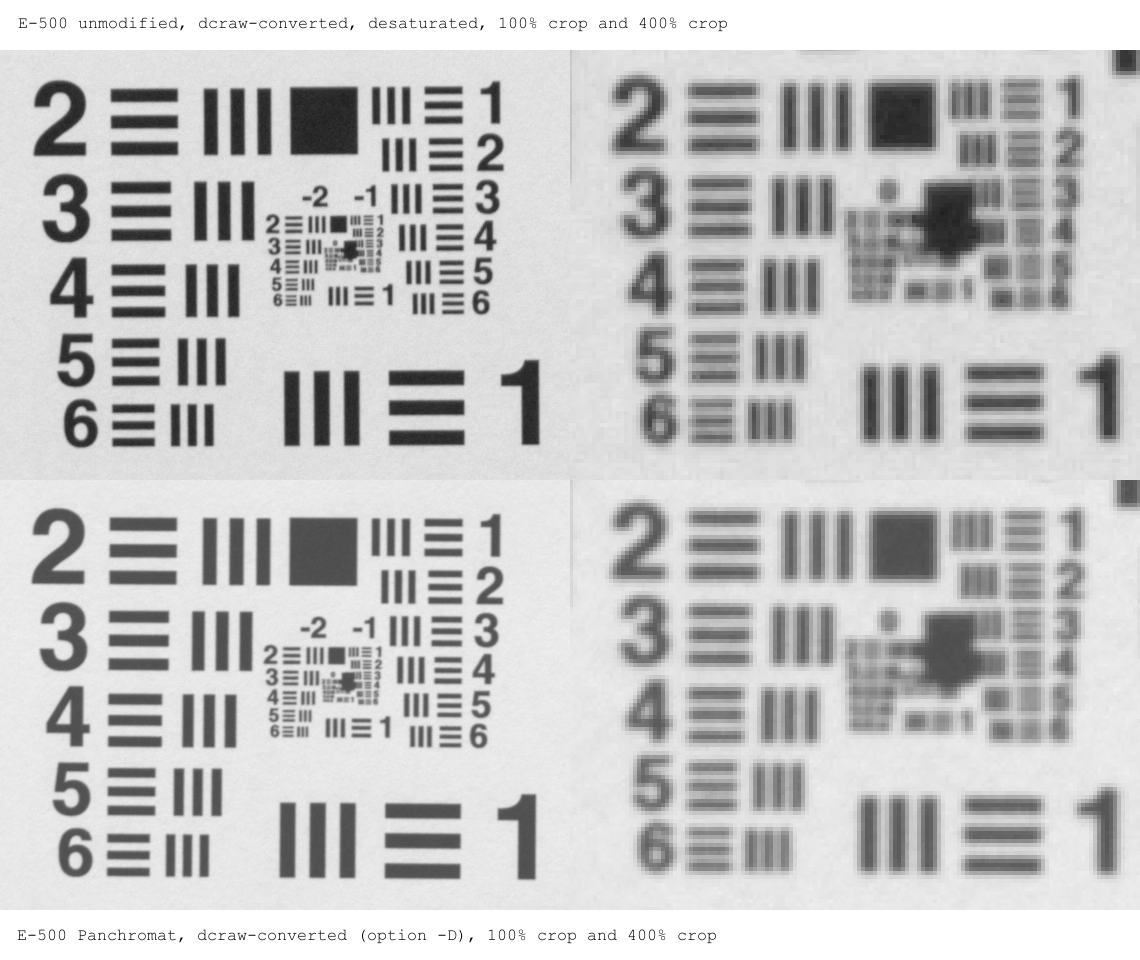
before and after with new sensor and no filters
Now there is a slight gain in resolution visible. Not as much as I had hoped for, but who knows... Maybe the 35mm Macro is already the limiting factor here?

before and after with new sensor and no filters
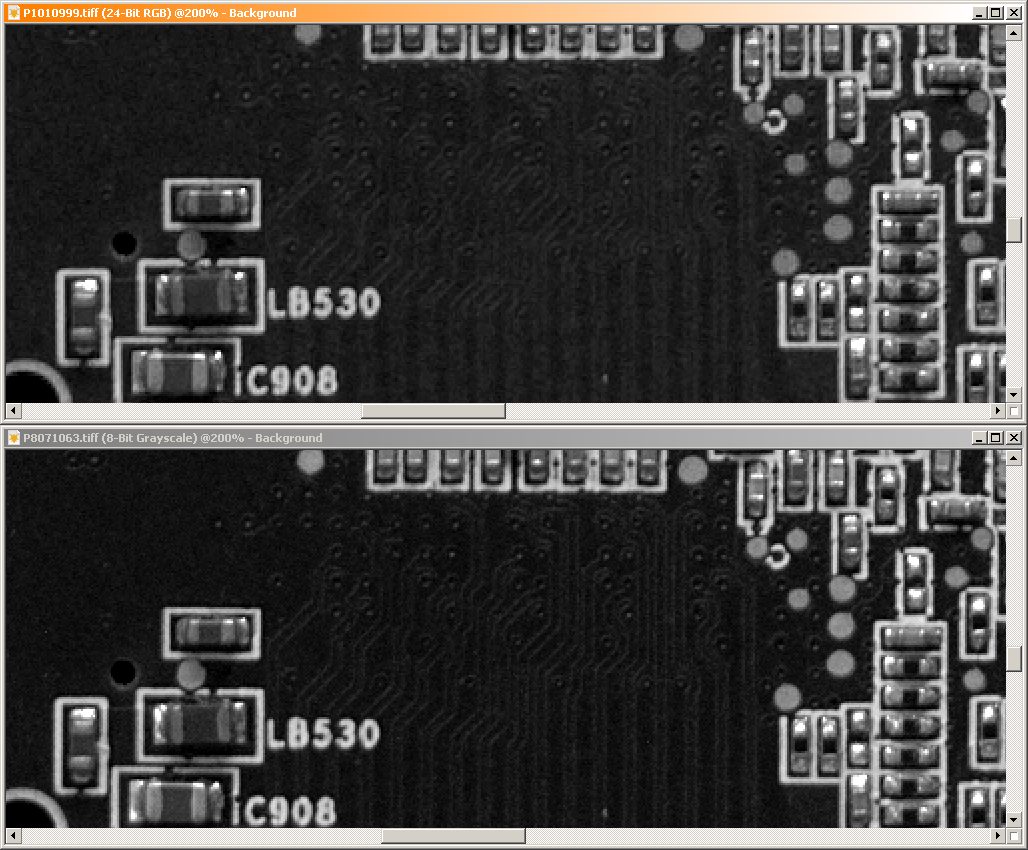
200% view with auto exposure and unsharp mask applied
Granted, a black circuit board may not be the best subject for testing, but it has lots of fine details and it was the best thing I had at hand...
The small tracks and vias are resolved much better now and are not as mushy as before.
Not bad at all: Camera is still working and it's resolving better than before. Not by much, but it's visible. Now I'll just have to get the autofocus working again and I'm happy :).

Noise and resolution from ISO50 to ISO3200
Here's the ISO performance. On the left you see the out-of-camera JPEGs, which should be as noisy as the original camera. On the right are the developed RAWs without further modifications. I used dcraw with the following parameters:
dcraw64.exe -a -H 1 -d -T
with 'T' for TIFF output, 'H 1' for correct exposure, 'd' for document mode (no debayering), and 'a' for automatic white balance. Using only 'd' without 'a' leaves me with a checker pattern in the output image. 'D' only (uppercase) yields overexposed images with clipped highlights, while 'D' together with 'H 1' underexposes. Here's some further testing I did with dcraw.
Here are the full frames for you to play with:
JPG: ISO 50, 100, 200, 400, 800, 1600, 3200
RAW: ISO 50, 100, 200, 400, 800, 1600, 3200
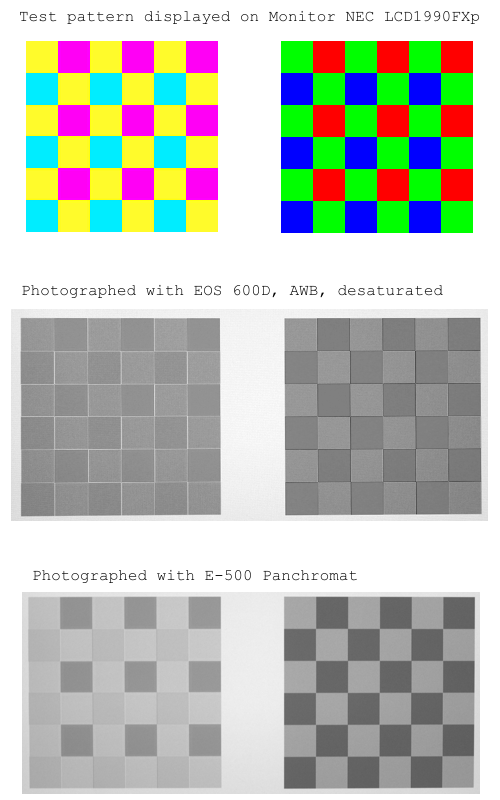
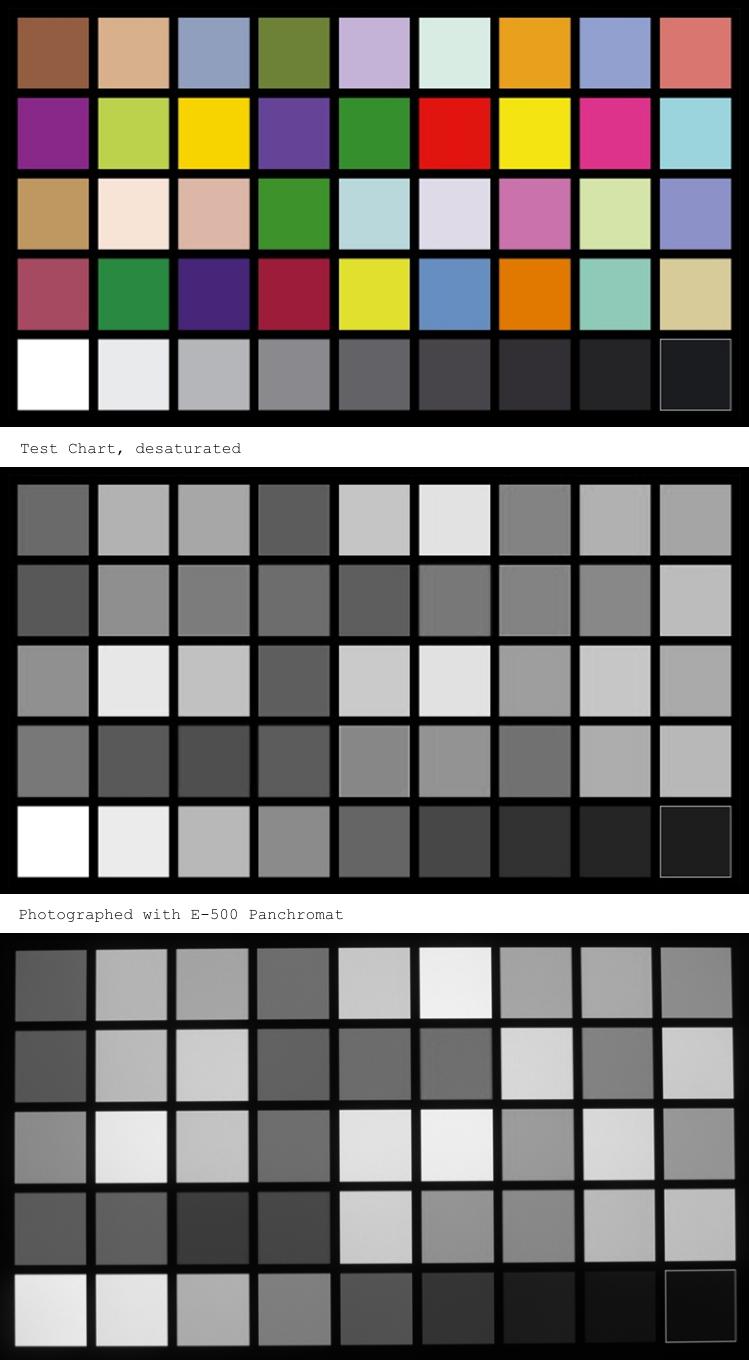
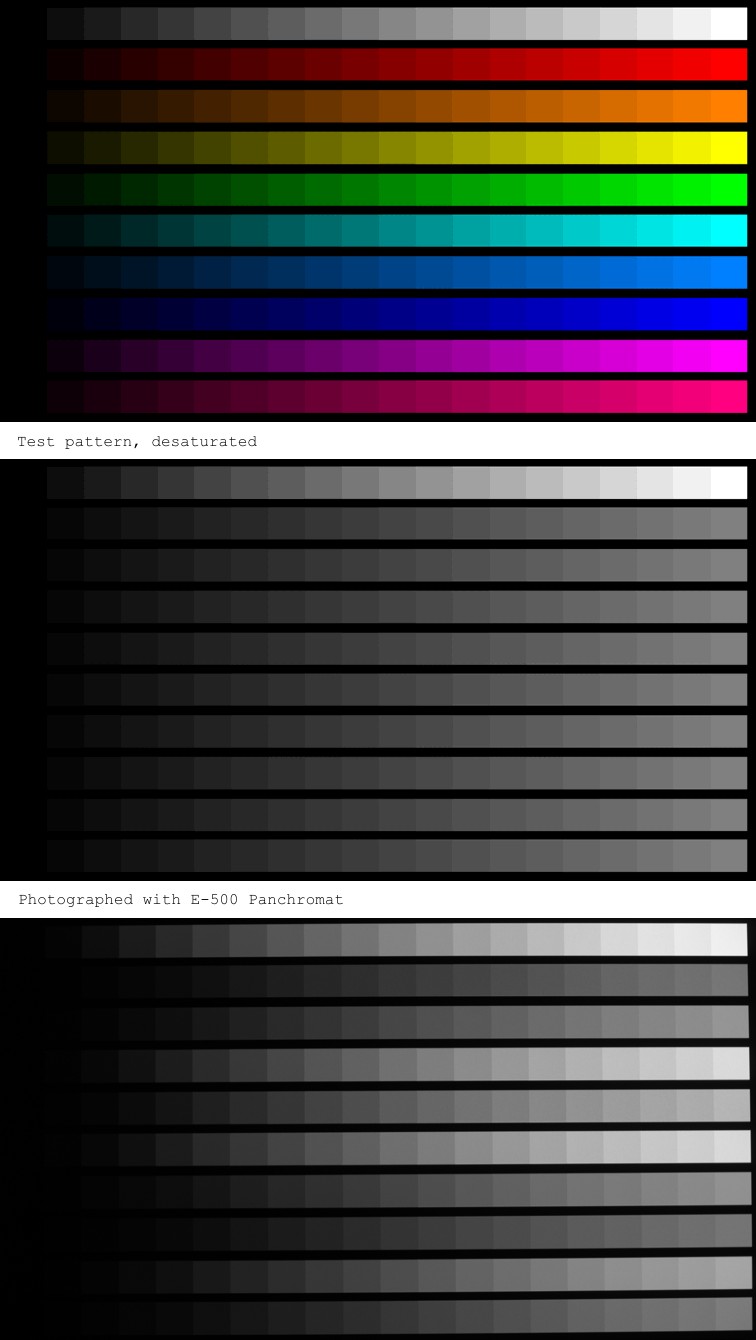
And now some shots showing the color rendition. Test target was my monitor, since I don't own an ink printer:
17.05.2014
Finally I got myself a new hot mirror. Been looking for an affordable 22.1mm x 17.3mm x 3mm sized one, but didn't find anything, so I ordered a round one. Namely a 43-842 from Edmund Optics. Not exactly cheap either, but probably as cheap as it gets.
Fitted it this morning:

BOROFLOAT is very brittle...
As you can see I simply removed the original filter with its corresponding parts and fitted the new one directly into the SSWF compartment. Since the original opening is 25mm wide, I only had to work on two sides and could simply press-fit the glass. While doing this I somehow managed to chip off a piece of the new filter. Damn it, but it's small enough to be out of the optical path.
In conclusion I'd say that it was worth the hassle, though. I'm left with a slight front focus now, but I can reach infinity again and the foliage looks natural again, too :).