E-500 Panchromat: developing raw files
After successfully swapping a DSLR sensor for a monochrome one, I'm now looking to make the most out of this mod. To take full advantage of the bayerless sensor, you can't simply run the raw files through any common developer like RawTherapee or Lightroom. They would still be using their demosaicking algorithms because they cannot know that there is no bayer grid anymore. Unfortunately I haven't found any developer with an option to skip this, except for dcraw, which additionally is open source and furthermore a well-known tool (think of Imatest).
Since dcraw offers you a handful of options, I've tried some of them and made a little table, together with some comments:
| command line switches | good? | comments |
|---|---|---|
| -d | :( | ''d'' is for document mode. Automatic exposure, clipping 1% of the highlights, fixed white balance based on a color chart illuminated with a standard D65 lamp. Since we don't have any colors, we don't need a standard white balance, so the result shows an ugly checkerboard pattern. |
| -d -a | :) | Like the above, but with auto white balance this time. dcraw is rather good at this, so the output should be sufficient. Still, there's 1% of clipped highlights, which may be too much already, depending on the image. |
| -d -a -H 1 | :) | Everything's fine here: awb, no clipped highlights (except for obviously saturated highlights), automatic exposure. |
| -d -r 1 1 1 1 -H 1 | :D | Like the above, but with a fixed white balance. Four ones mean every subpixel gets treated like the other, so we're constantly free of checkerboard patterns. I compared ''-a'' to ''-r 1 1 1 1'' with slightly different results: Either there was no difference at all or only a really minor, negligible one. I'd opt for this as the standard setting for monochrome developing, though. |
| -D | :) | Uppercase ''D'' is almost like ''-d -r 1 1 1 1'', except for the missing auto exposure. The black level doesn't get calculated, which makes the shadows appear foggy. I thought this could be managed with ''-k'', but it seems this is only possible with together ''-d'' (and the other interpolating modes). |
| -D -H 1 | :( | Basically like ''-D'', but without clipped highlights. Yields much too dark images, probably not useful for anything. |
| -E | :) | ''-D'' and ''-E'' are pretty much alike, except for ''-E'' giving you the whole sensor area output without cropping the masked areas. May be useful should you need a visible black (or noise) reference in your image. |
| -d -r 1 1 1 1 -H 1 -6 | :D | Standard setting with ''-6'' for 16 bit output. Very handy if you're going to apply some filtering afterwards, like Silver Efex Pro or the like. |
| -E -r 1 1 1 1 -x 0 | 8) | The alert reader might have noted that there's no ''-x'' in dcraw. That's true, I've put it there myself. This option allows me to set the percentage of pixels which get clipped when using ''-H 0''. It defaults to 1% which is too much for me in many cases, so ''-x 0'' yields a perfect exposure without clipped higlights, even when using ''-D'' or ''-E''. |
There're some more things like gamma, but this depends on the image and personal taste. For further editing I'd advise you to use the 16 bit output, to keep as much subtle details as possible. Use ''-T'' to get TIFF files. Which settings suit you the best is up to you and your images, so here're some crops to see the possible outcome:

100% crops from a single raw file
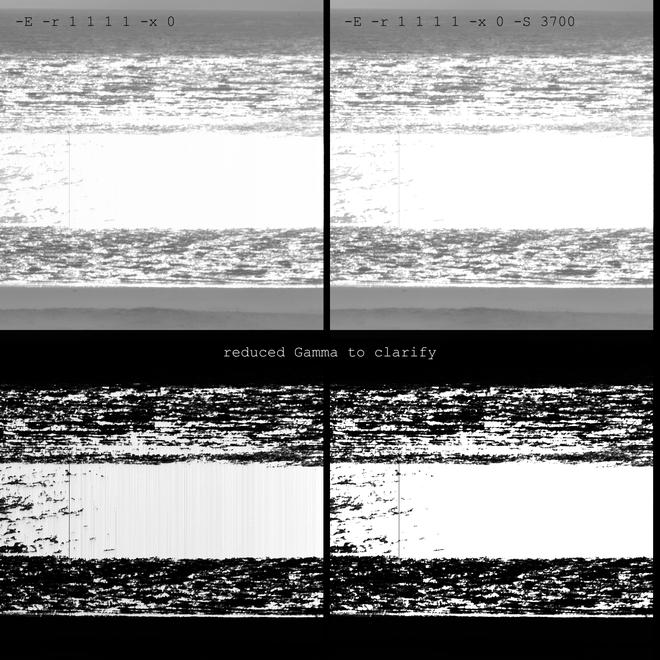
After some more messing around with the source code I eventually created a setting which uses the whole sensor area (like ''-E'') and has a scalable (via ''-k'' and ''-S'') auto-exposure. My sensor has a black value of 63, which is found by dcraw automatically, now using ''-D'' and ''-E'', too. For a good saturation value I had to try a bit to find 3700 as a useful one. Automatic values are in the range of 3900 and reveal some vertical banding instead of real detail in the highlights, which is not exactly beautiful. Using ''-S 3700'' yields a nice, even white without banding and without clipping the highlights. Here's an example with a strong reflection on the sea, together with reduced gamma images to clarify the banding effect:
